*This was a personal project & story primarily by Laundry ECD PJ Richardson
How I expanded outside of my creative comfort zone (and you can too.)
The short broad-stroke answer? By taking a series of very small baby steps to get comfortable with being uncomfortable.
The long answer? In my case, embarking on a 10-month Design conference branding & animated title sequence passion project for Graphika Manila, in Manila, Philippines.
Here is how I did it. But more importantly what I learned and where I learned it to help inspire anything from shortcuts to cheats, as well as the mental barriers I put up and how you can avoid them.
Let's first start with the why. As creatives, we always want to feel a sense of excitement in our work. I certainly do. While I help clients make incredibly vibrant design and animation, a part of me felt like I was stuck in the same old tricks. What if no one wanted to buy those tricks anymore? What if they got old and irrelevant? What if I got old and irrelevant? At the same time, Aram from Graphika Manila invited me to design a poster and the title sequence.
Discovering my creative Purpose.
This is where the worlds and questions collided. What would excite a mostly young professional and student audience at the conference? To see something cool and learn the process that went into making it. That was the lightbulb moment. What if I became the student? Found artists I really admired, studied their work with every little detail possible, then figured out every which way possible to take that inspiration and bring it to life like I was in art school again. And that is what I did.

I adore the design work of Beeple (shown above), Ash Thorp, Patrick Claire and Gmunk forever. It gives me the holy s%^t vibes every time I see a piece of any of there's on Instagram. The technical aspect, the elegance, the detail and just that glow-y magical Blade Runner-esque feeling in different ways between all of their work has inspired me for so long. Beeple in particular I was drawn to particularly for the tokyo inspired neon vibes. I wanted to learn every little element of visually how we made what he made both technically and creatively somehow.
Wait, what is the concept and reason to make this?
I've jumped ahead sort of. While I knew the visual world I wanted to learn, I needed a reason. A concept. A narrative. Design conferences at their best encompass creativity and process. To me, that is the journey we all go on to create things. The loneliness of it, the experimental and often frustrating side. The enlightening part of it. And the ambitious nature of creativity where you reach for a place you've never been process wise at it's absolute best. Then you get restless and start over.
It is essentially an infinity loop. This became the visual story I wanted to tell.
The Sketch Phase.

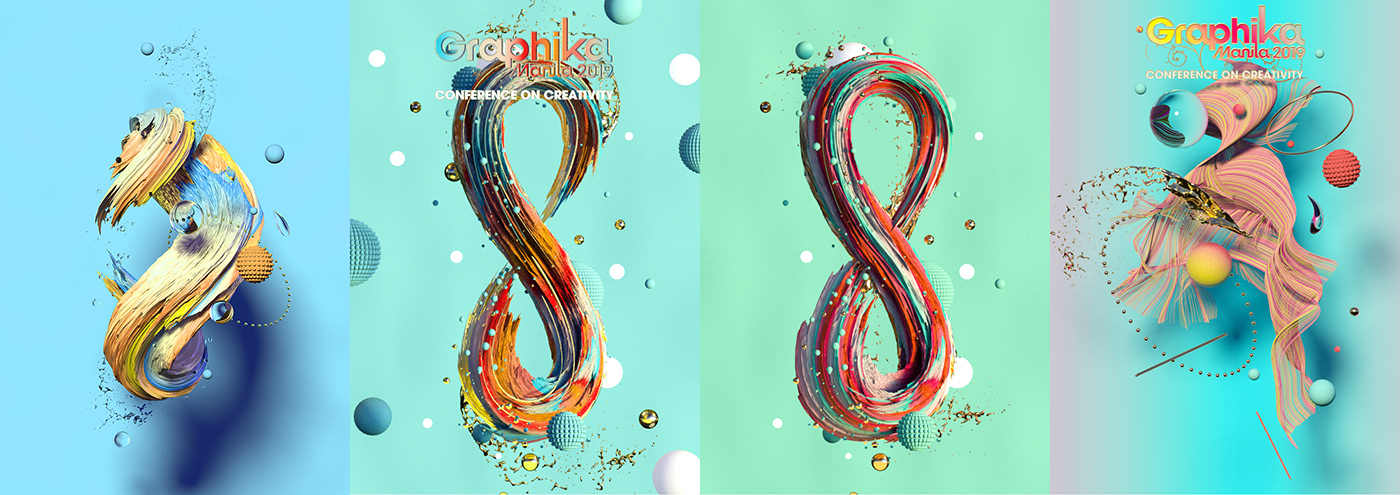
So began the sketches, mostly in 3d. At first I wanted to connect two hands reaching for something above them and each other in an infinity shape. Two problems emerged. The first was it looked like the number 8. The second was that two hands by themselves looked a little creepy which was not the vibe.

What did emerge that we both liked and made sense conceptually was this visual idea of an artist brushstroke. It was pretty accidental, but looked cool. I was especially liking the dimensionality you could get with a 3d brushstroke in physical space. It felt more like an infinity loop and more physical in a way which was exciting to look at. In the back of my mind I kept thinking about the work of Rik Oostenbroek below but with a more painterly quality to represent art in this challenge.

How did I get there technically? Shockingly simple even for me, the over-complicator of just about everything. In cinema4d, I stretched a landscape object over an infinity symbol shaped vector spline and added a gradient. The pretty colors and lighting? I used a CGI sunlight and used GPU renderer Octane to render it.
Which eventually evolved into this poster.

Now for the title sequence.
Narratively, it was back to the infinity loop idea but with all the emotional ups and downs story wise. Except there was one problem. While I have worked on title sequences, I had absolutely no idea how to design for them. It was an ugly truth I had to admit.
So I mentioned I look up to Ash Thorp. Awhile back, he started an online school called LearnSquared. Within that he offers a title sequence design class. I got an email that the class was discounted to $125 dollars so I took the class. And learned a ton. I learned about using grids to place my titles. Using grids to place objects and compose my layouts. Even a little bit about finishing and pacing. I had made many assumptions, or naively thought I knew it all. I knew very little and this class helped teach me a ton.

Finding Inspiration.
While I had a sense of the story and the style and tone, I was still a little lost. The class taught me about mind mapping to create a conceptual thread and taught me about gathering visual reference. Below are some of what I compiled to help build a picture of where I would go visually which I found all on pinterest. A technique that helped was to organize reference by looks to help inspire either a shot, or a technical approach I wanted to figure out like CGI fog.
*Visual Reference below gathered from Pinterest.


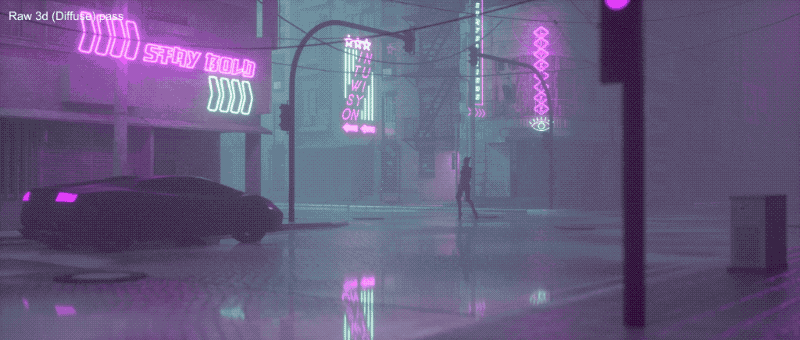
I was especially enamored with the stylized fog looking imagery above. Not only was it mysteriously beautiful, but the minimalism of it felt like loneliness to me but in an inspiring way. It reminded me of growing up in San Francisco actually. It also served as a beautiful set up for when the visuals got more exciting. More than anything, I wanted to learn how these artists made such cool imagery.
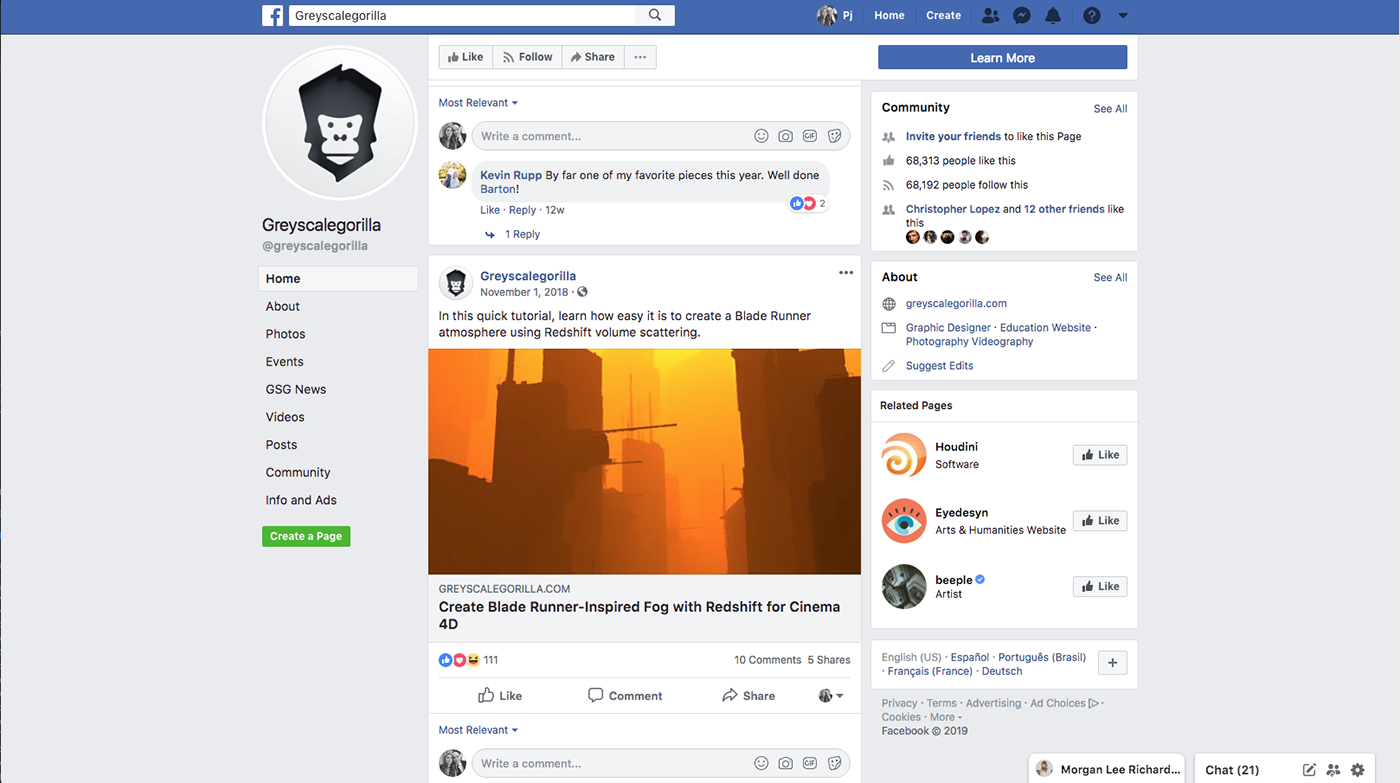
As fate would have it, I accidentally stumbled upon a link to a CGI fog tutorial on facebook featured on greyscalegorilla. It was exactly what I was hoping to figure out in a short easily understood way. The only problem was that I did not know redshift. But that it could be done pointed me towards google searching fog effects for octane which yielded similar solutions.
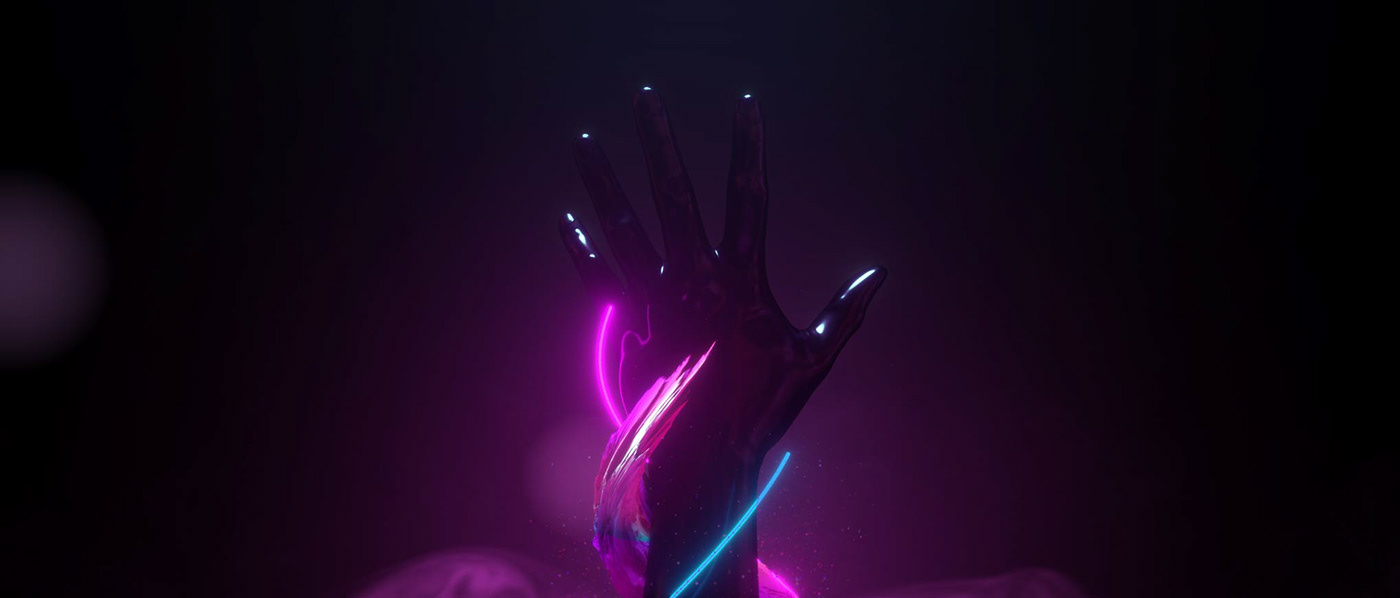
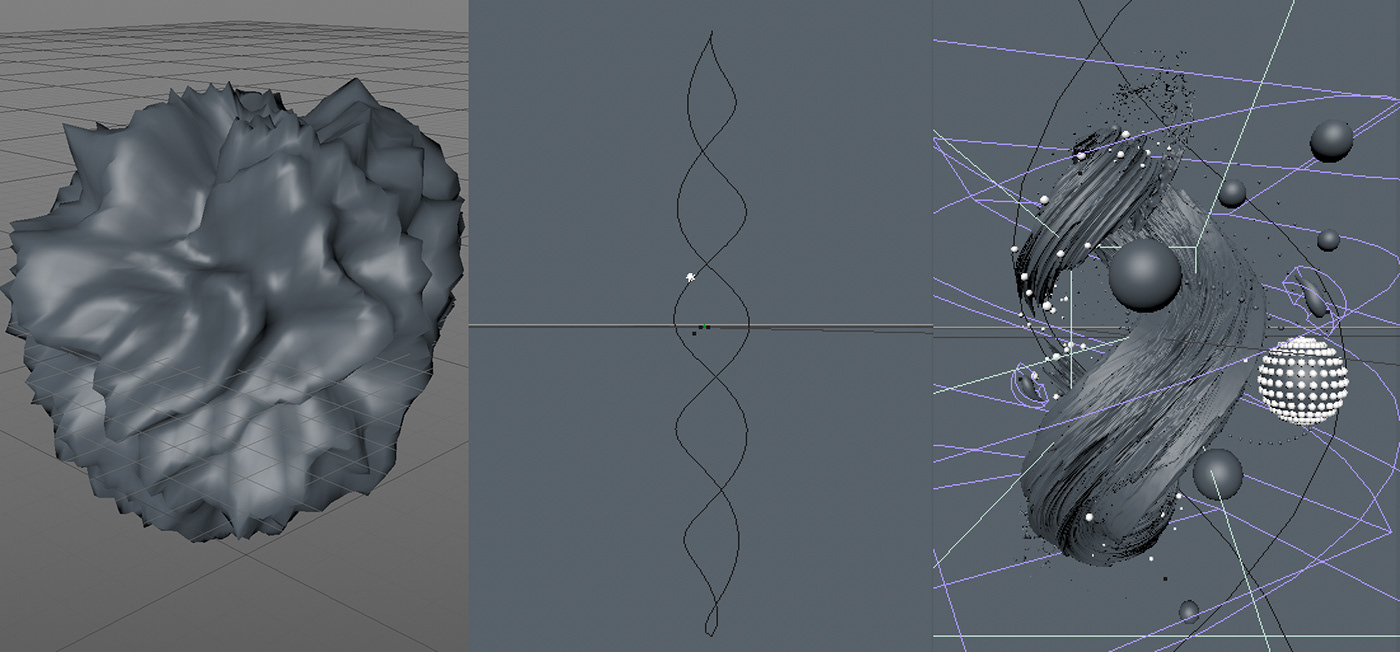
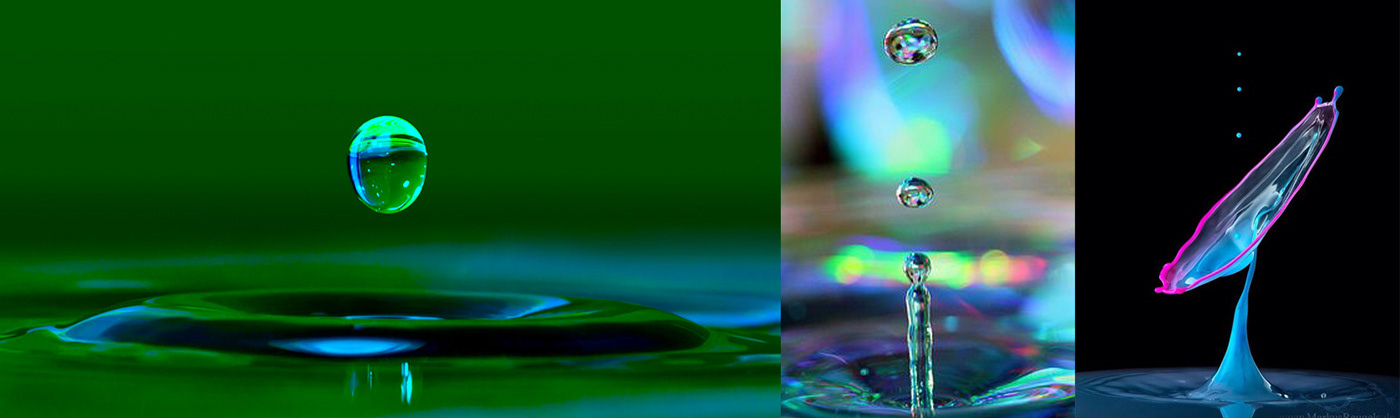
Additionally, I was infatuated with this idea of a single raindrop becoming a source of creative inspiration symbolically. Like one little thought, inspiration or even just pause could give birth to a multitude of creative flow and imagination. I also wanted to tackle the ever impossible task of particle simulation effects. I had done this little visual experiment about a year ago just for fun and had always wanted to explore it much further and learn how to turn it into motion.
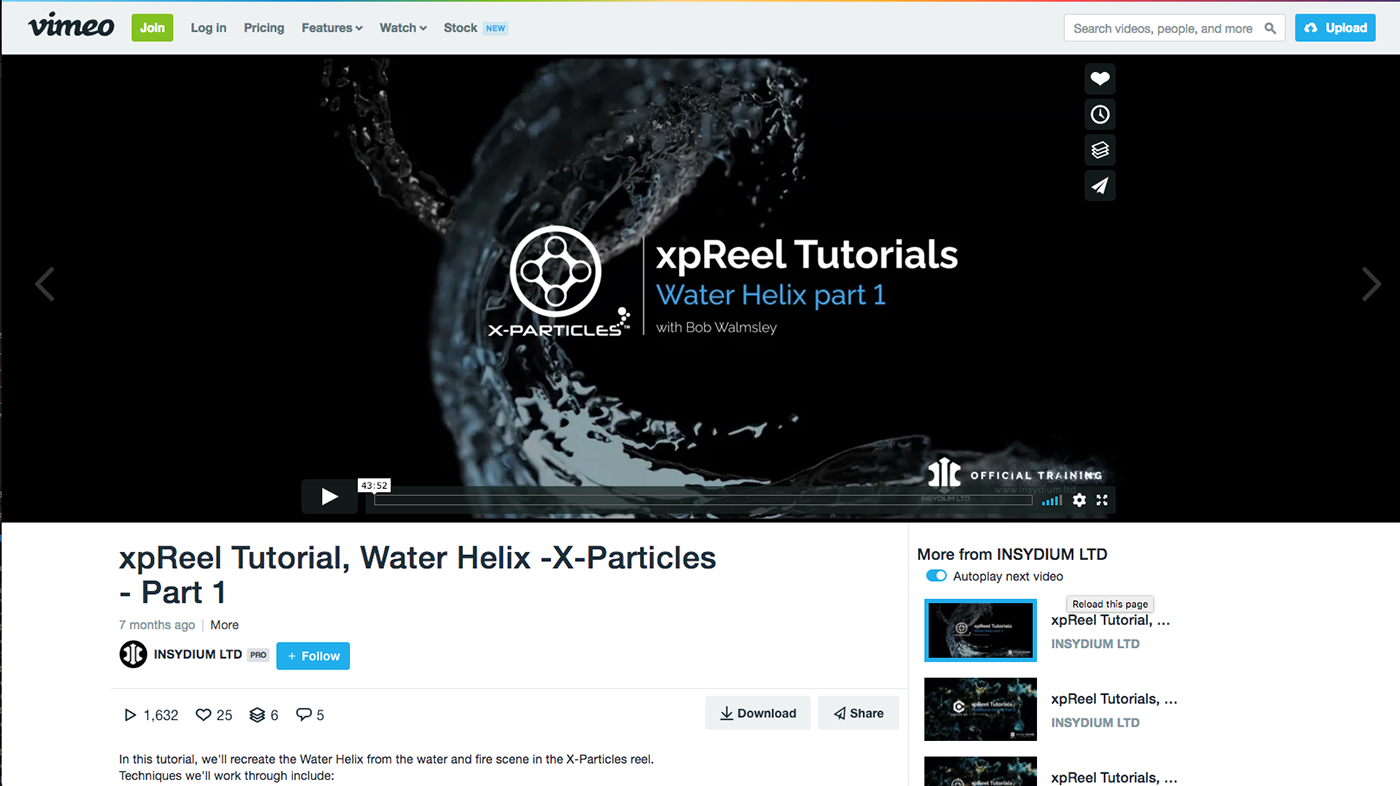
I explored houdini (the most complicated), particular in after effects (the easiest) and settled in the middle with x-particles in c4d (Still really difficult.) I envisioned this overhead shot where a single droplet rising turned into a stream of rising liquid. This was meant to represent the expansion of the creative flow. I found an excellent tutorial on x-particles liquid here, that helped inspire the final shot. I also had help from our studios resident particle master Alan Ng.
This got me through some of the more difficult technical tasks that had intimidated me at the start. But to really figure out the narrative, I blocked out a very rough outline of where I wanted this to go. It was not pretty, but it was helpful to block out where and what worked.
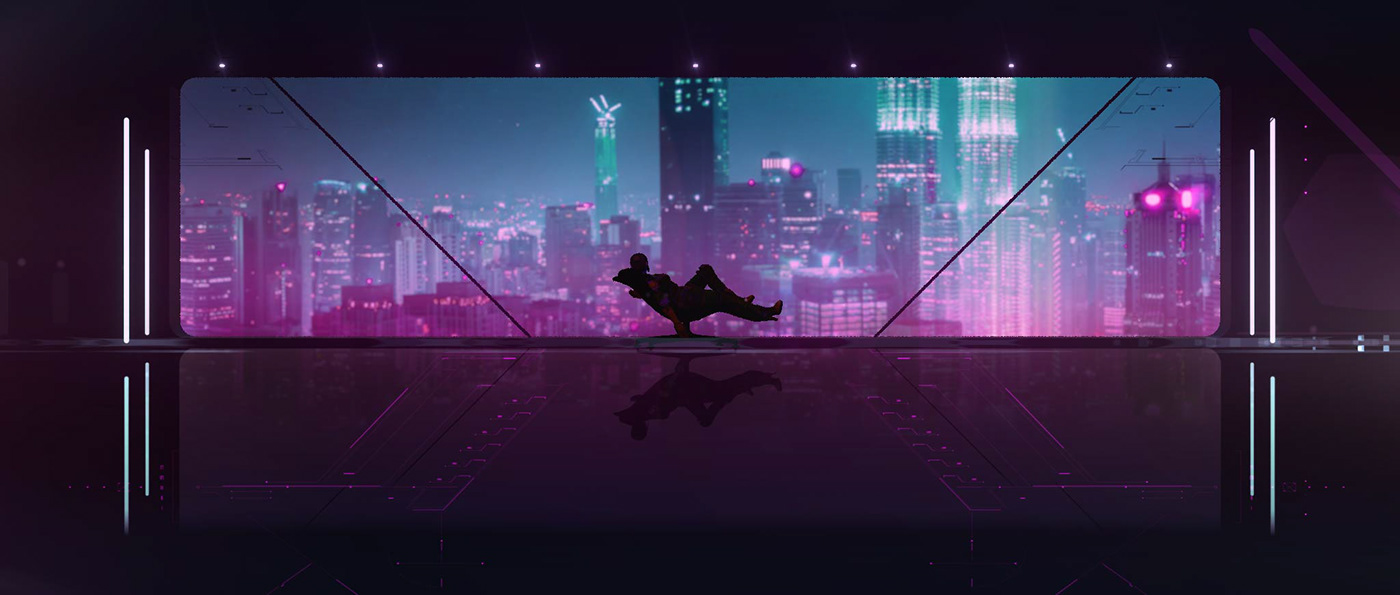
From here, I went shot by shot both in 3d and in after effects and really started to build up each scene. What I realized fairly quickly was that I did not need to 3d model entire cities for each shot. I could use stills for a lot of the backgrounds and hide a lot of detail with background blurs and shallow depth of field.

What I also learned, was just how much color correction can do for a shot. On the very first city shot below, one of the things I struggled with for weeks was that it looked really 3d and bare no matter how hard I tried. I am just not a good 3d modeler yet. Accidentally, I was adding color layers and overlays, and again discovered I could hide a lot with color adjustments. It actually looked even cooler that way to me.
While there were a few more tricks along the way that I discovered, from here honestly, it was just grinding through as many of the shots as possible with the time I had left.
The final piece of the puzzle: Music & Sound.
While I knew and had reference of where I wanted to take the music emotionally, it was my long time pen pal and world class music and sound legend Marcelo Baldin from Combustion who brought this all together. I live in LA, he lives in Sao Paulo, but over a series of email exchanges and sending rough cuts he built a beautiful audio score and sound design pass that really completed this visual emotionally. I am indebted to him as it elevated the narrative just with the sound ten fold. Lesson. Pay attention to music, it can make or break a piece.
Here are a few specs of how this came together behind the scenes.
Schedule. I gave myself about 10 months to do this. I highly recommend longer than you think it makes it way less stressful.
Computer used. 2017 Retina Display 5k Imac. 4.2 GHz Intel Core i7. 64 gigs of Ram. OS X High Sierra. Previs, lighting and texturing on an OWC E-gpu with an Nvidia 1080 card.
Software. 3d was done Cinema4d r18. Rendered in Octane Render 3.08.5. Particle effects were done in X-Particles 4.0. Compositing all in After Effects CC 16.0.1
Rendering. The majority of the animation was rendered on an 8x Titan Card Render box via Deadline.
Conclusion & What I learned.
While extremely difficult in every which way, the major lesson I learned was to give myself a lot of time when learning a new medium and technique. I stress out easily especially with technical challenges. But giving myself 3 times longer for each obstacle let me struggle, then discover answers days later instead of once. Additionally, breaking it into very small pieces was everything. I set small goals, like rough out or texture shot 1 tonight. Then another section the next night. This reduced getting discouraged dramatically.
Here are some final stills from the piece and the conference branding.
Thank you if you got this far.
-PJ
A special Thank you to Marcelo Baldin & Combustion for the beautiful audio, Yang Liu & Alan Ng from Laundry for the texture & particle help, and to Laundry Studios for all the technical power to get this produced.